Device Onboarding
Device onboarding is how you securely register Nordic nRF91 Series chips into nRF Cloud. Onboarding is secure by default: every device is verified against its Nordic Identity, a cryptographic identity injected into the chip during manufacturing and protected by a hardware root of trust.
Because that identity lives in silicon, you never handle private keys during production, and you can provision credentials over the air once devices are deployed in the field.
Before you begin
- Supported hardware: nRF9151 and nRF9161.
- Device firmware: The device must run firmware that includes the nRF Cloud provisioning client. The provisioning client is not enabled by default. See Device firmware requirements.
- What you need: The device's attestation token which you can get by running
AT%ATTESTTOKENon a single device.
Device firmware requirements
Adding a device in nRF Cloud registers its identity, but the credentials
themselves are established by the device. When it connects, it retrieves and
executes its provisioning commands. It generates its own key pair inside the
modem, so the private key never leaves the device, and installs the certificates
issued by nRF Cloud. This work is done by the
nRF Cloud provisioning client
in the nRF Connect SDK, so your application firmware must include it before the
device can finish onboarding. The client is opt-in, so enable
CONFIG_NRF_PROVISIONING and configure it as described in the
library documentation.
For new designs, start with the Asset Tracker Template (source). It is the recommended starting point for nRF91 Series applications on nRF Cloud, and it already enables the provisioning client with a working configuration, so devices based on it can be onboarded without further firmware changes.
For a focused look at the client, build the nRF Device provisioning sample.
How secure onboarding works
When you onboard a device, nRF Cloud uses an attestation token derived from that identity to verify that the device is genuine Nordic silicon and create a secure chip-to-cloud connection before it adds the device to your project. You can add the device via nRF Cloud which avoids sensitive key handling on your manufacturing line.
Once you onboard a new device, it will show up in your Device Fleet page and update its details when it checks in.
How to add new devices
The steps below add one device at a time. To onboard multiple devices programmatically, use the Create nRF9x Devices in Bulk REST API endpoint.
-
In nRF Cloud, go to Fleet → Devices.
-
Select Add devices.
-
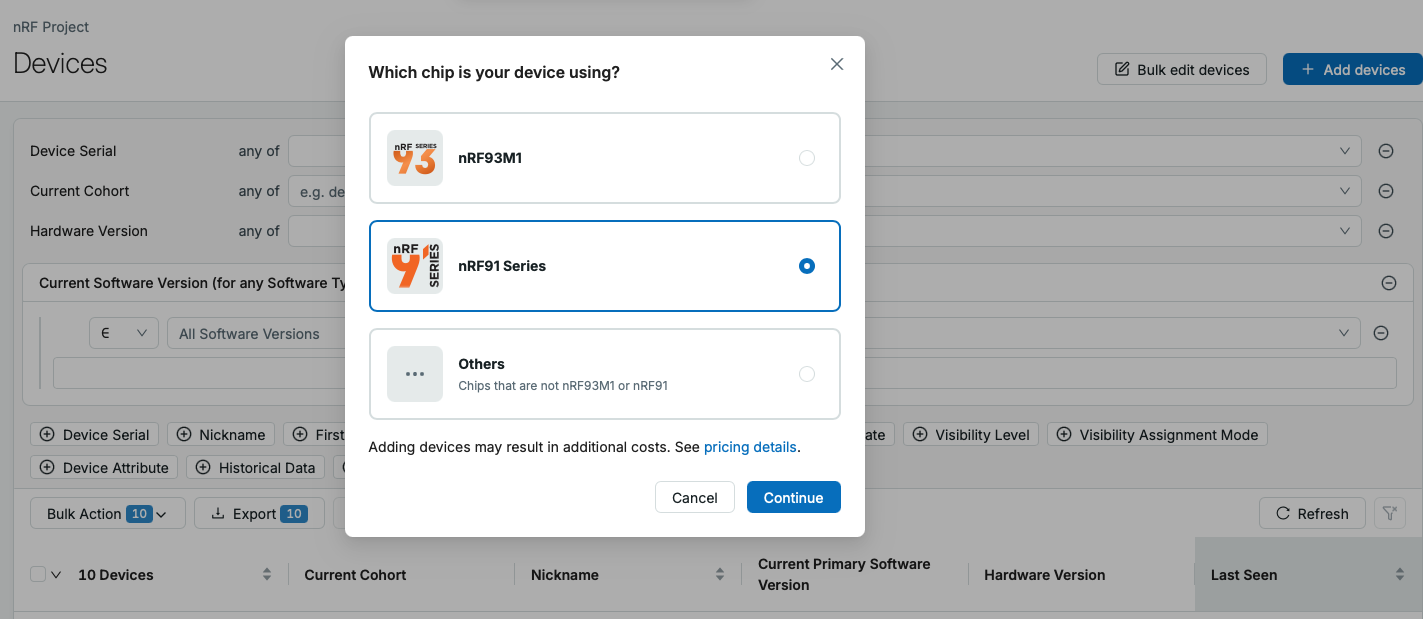
You'll get a prompt to select which device you are adding to nRF Cloud. Select the nRF91 Series.
-
To add a device, you'll need to get your device credential via an attestation token. Run the
AT%ATTESTTOKENcommand on your nRF9151 or nRF9161. This will give you your attestation token in the following format:%ATTESTTOKEN: "your attestation token here". Copy the token from your device.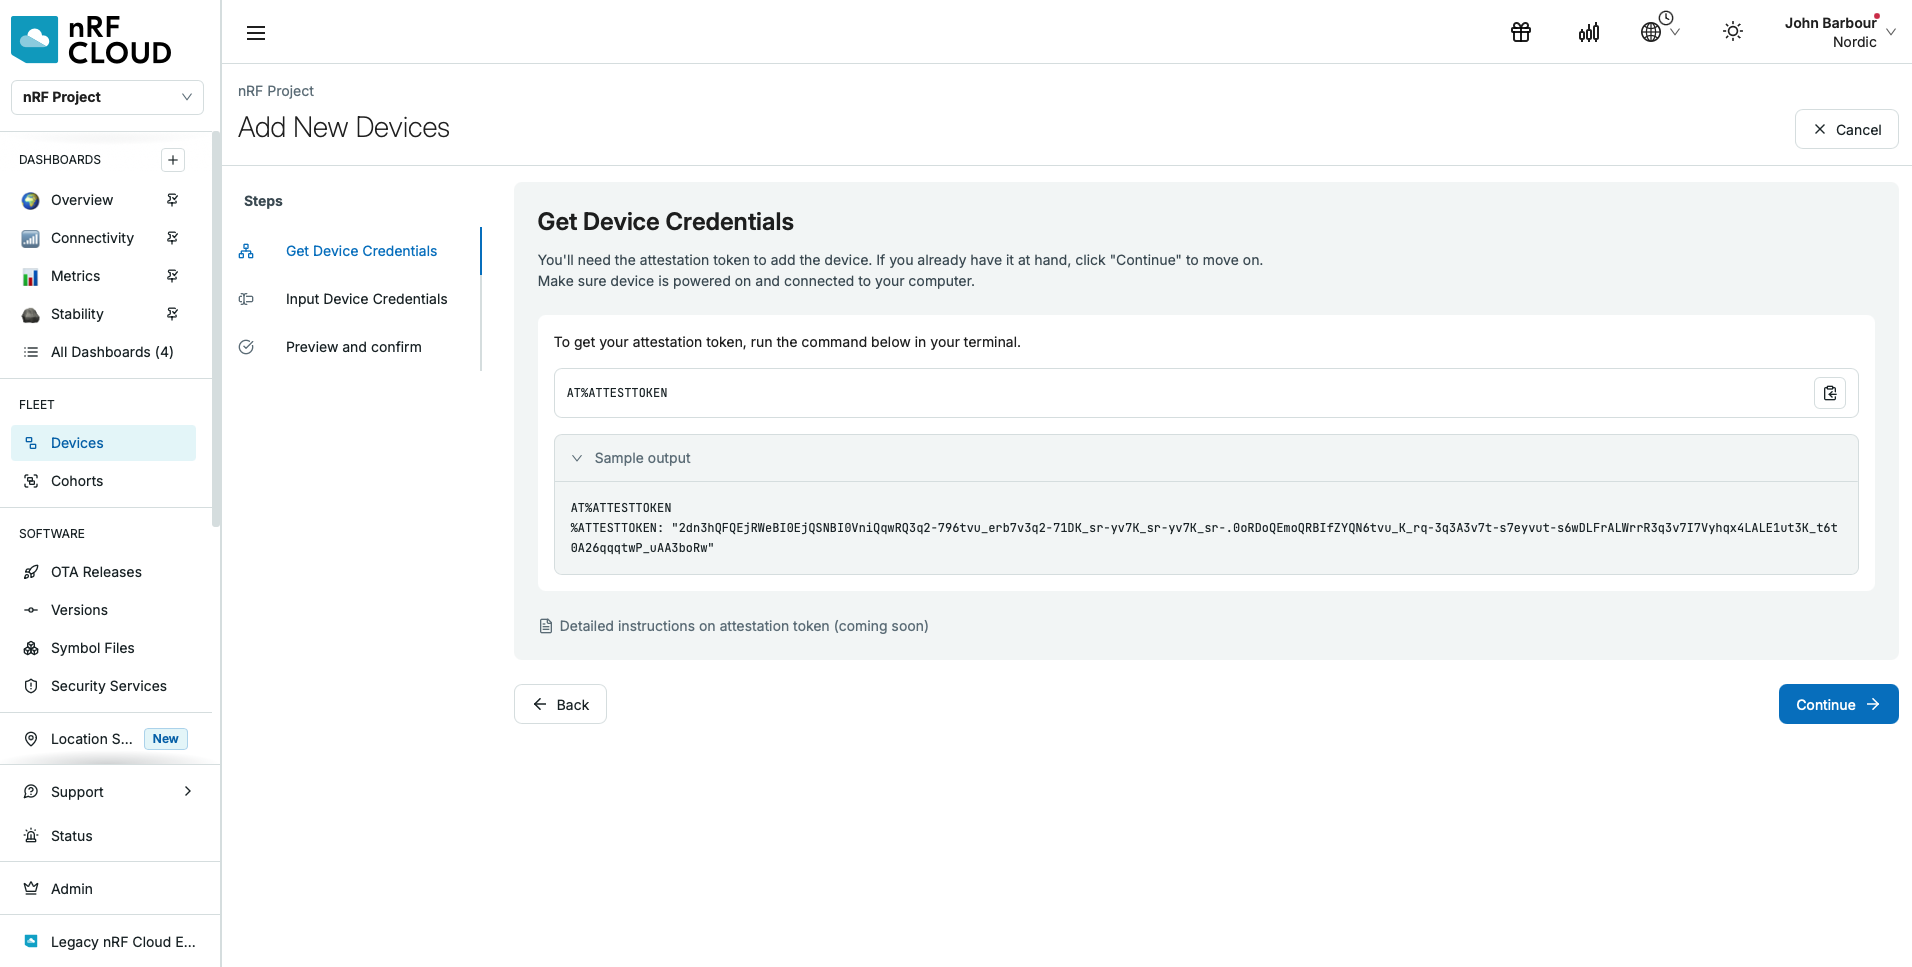
-
Paste the attestation token from your device into the
Attestation tokenfield on the Input Device credentials screen.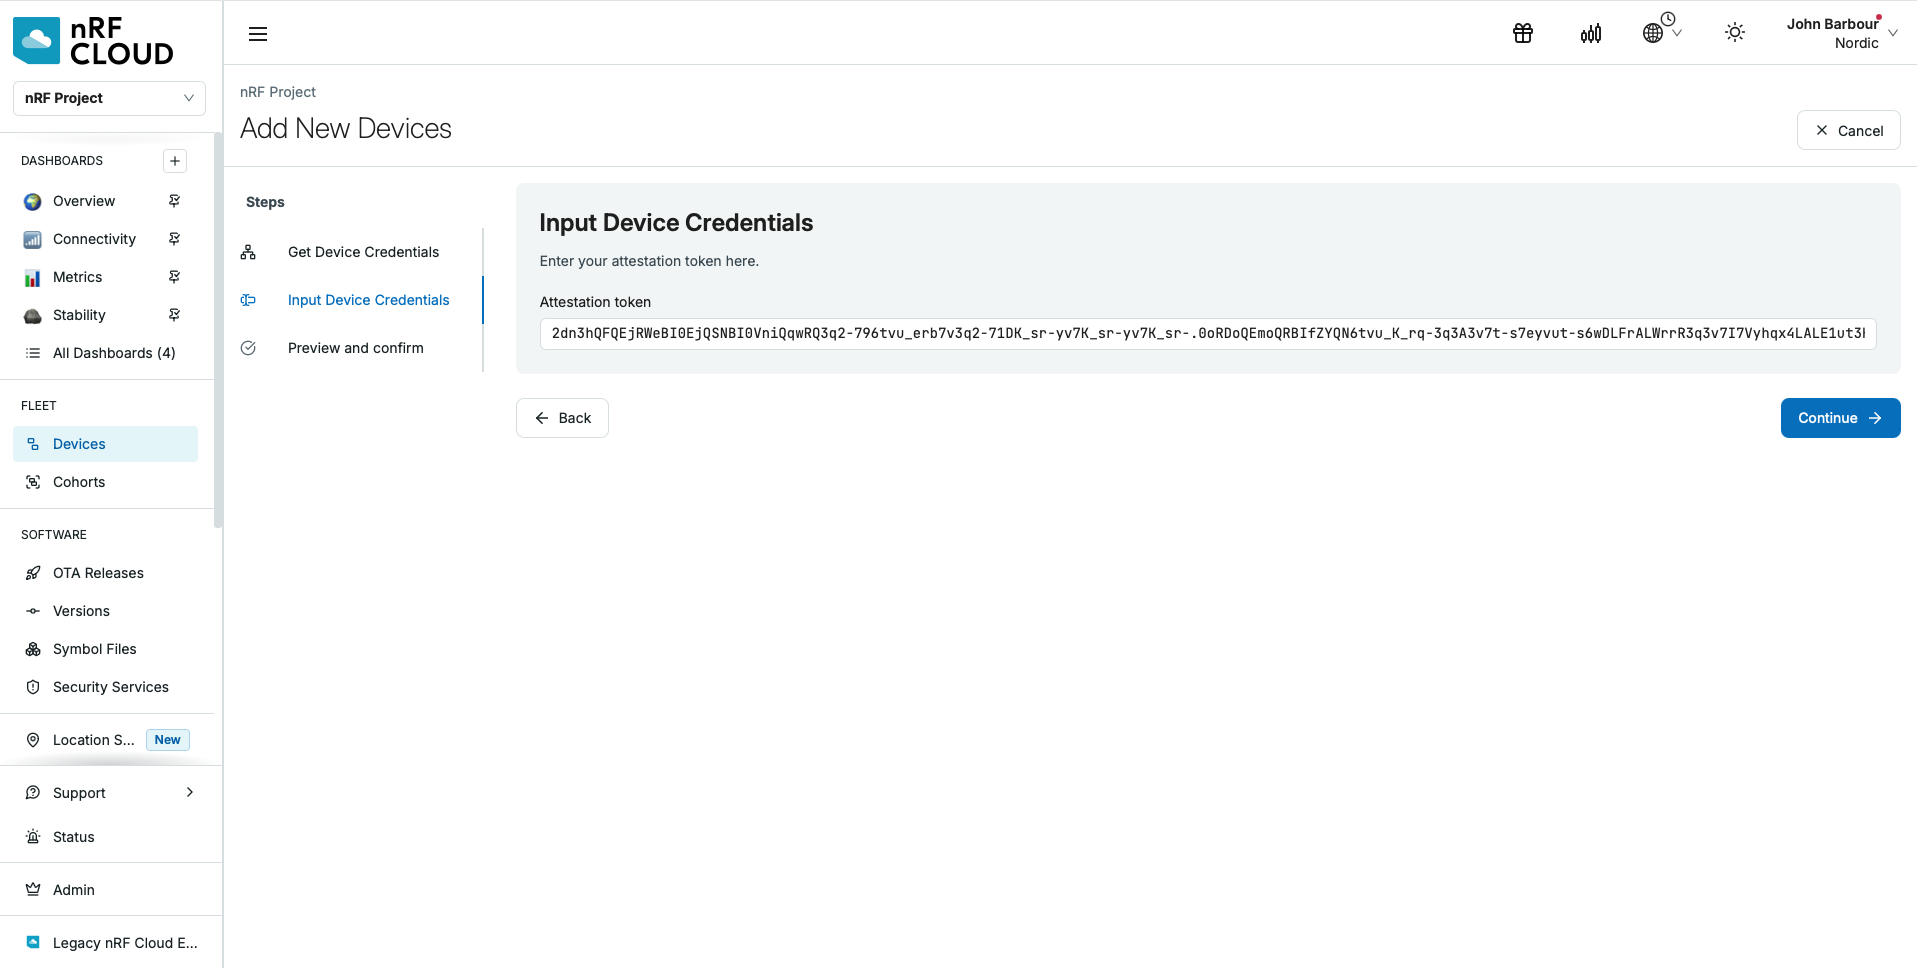
-
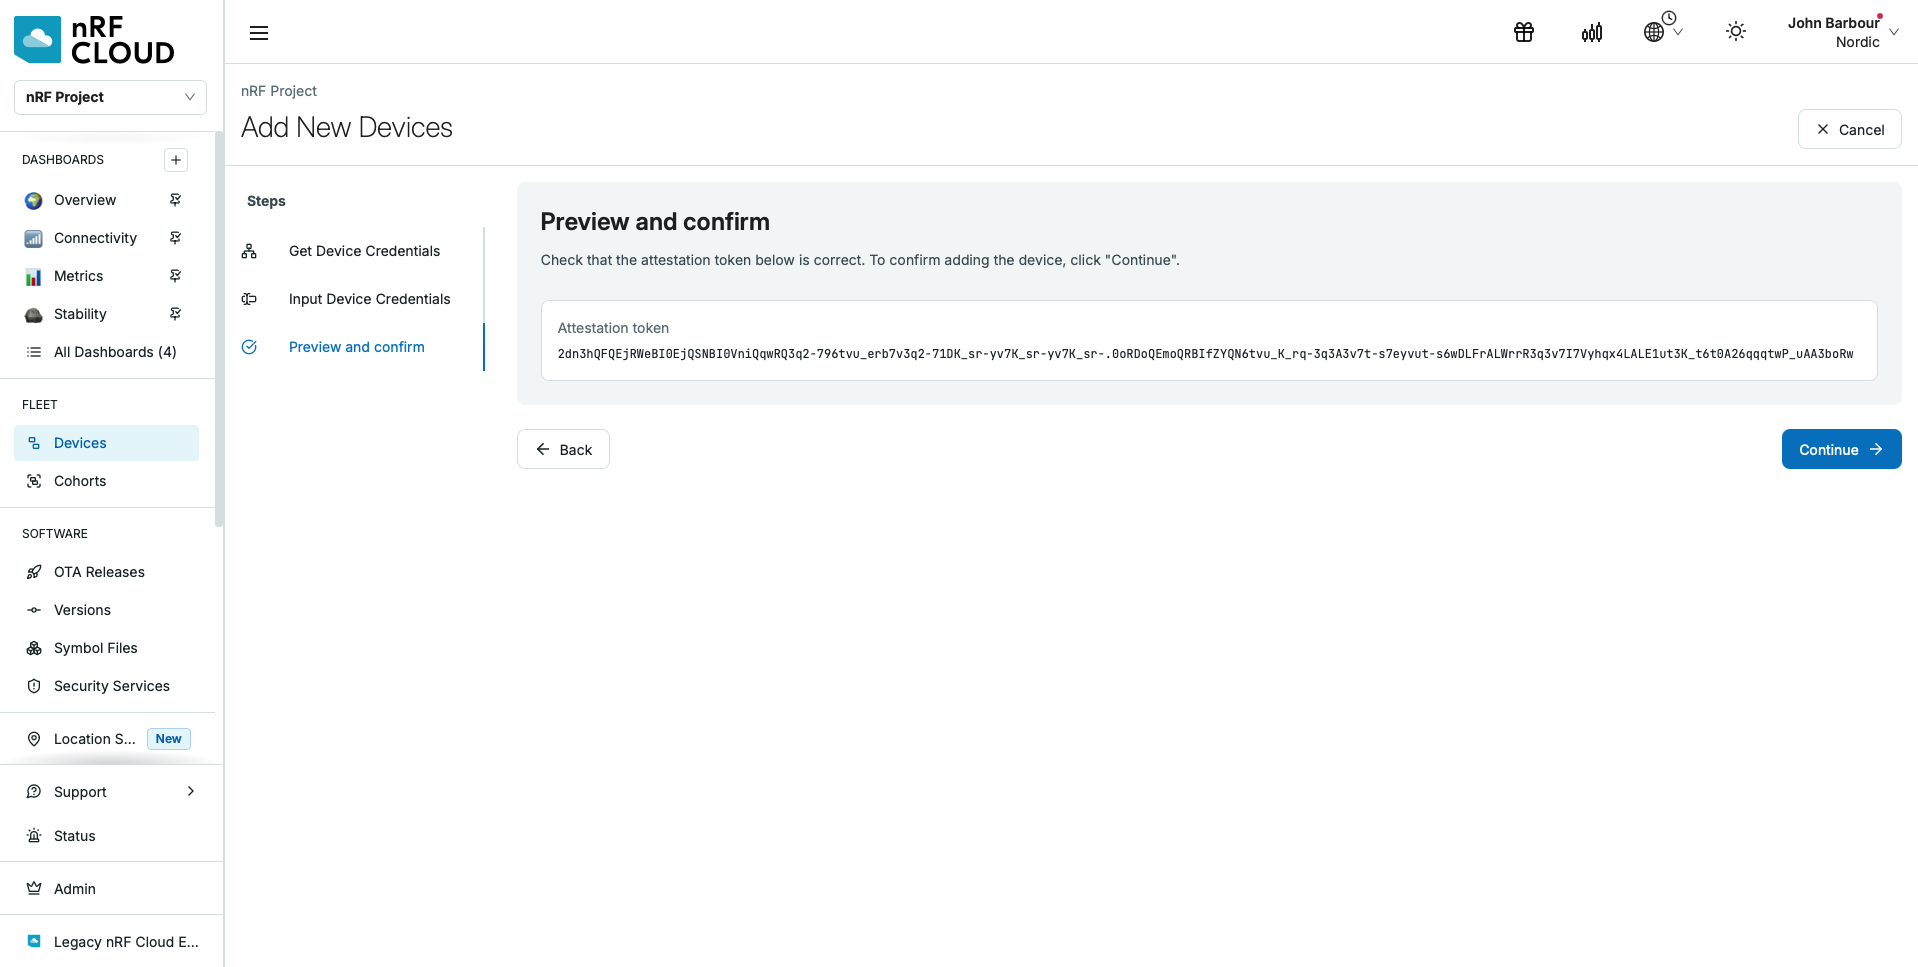
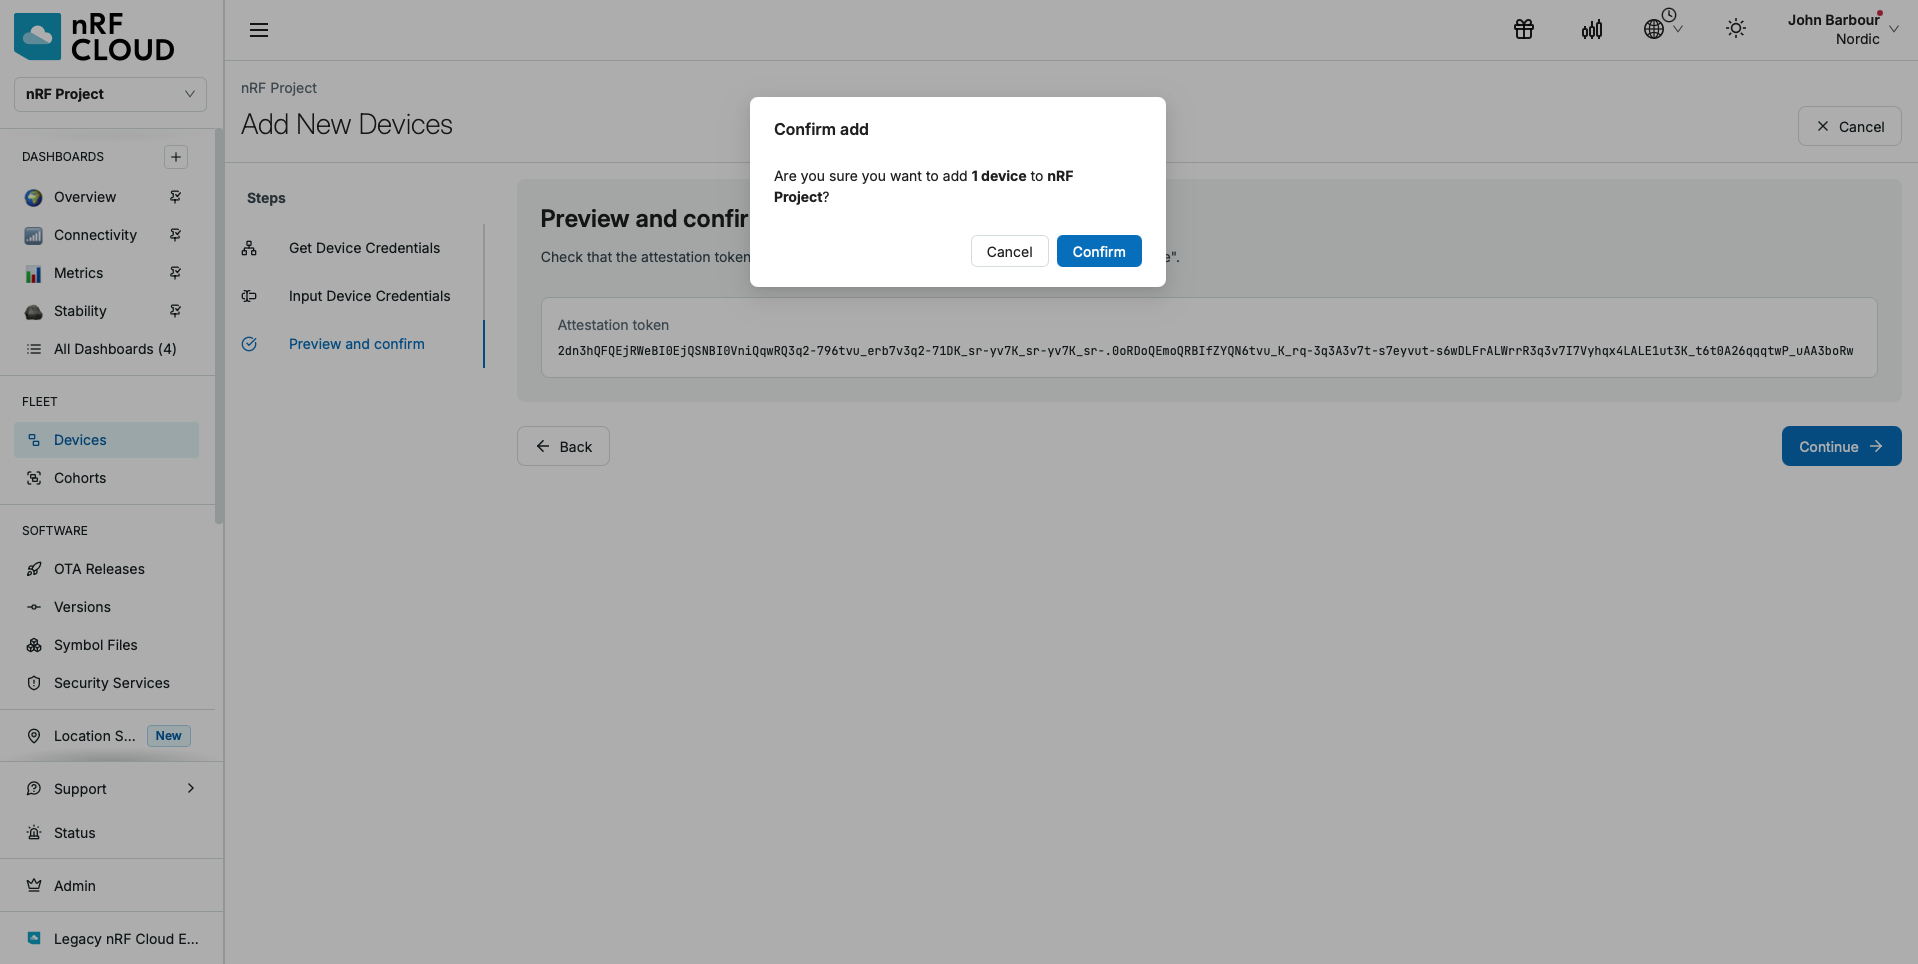
You'll be able to preview and confirm the token before adding it to your device fleet.
What happens after onboarding
Devices appear under Devices within a few minutes of being added, but they are not yet fully operational. When a device first connects to nRF Cloud, it begins provisioning, which generates and registers a new cloud access key. The device becomes fully operational after the final credentials are installed.
Provisioning happens automatically, so no action is required during normal onboarding. To confirm that provisioning is complete, open the device details page and verify that its Provisioning Status is Successful.
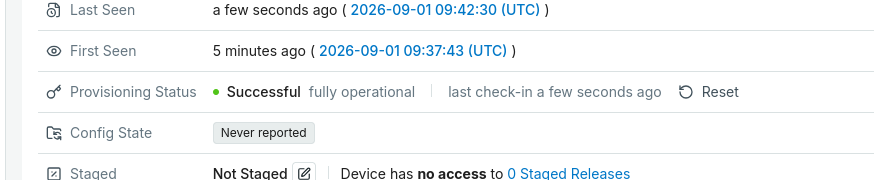
The Provisioning Status row also shows when the provisioning client last contacted nRF Cloud to check for provisioning commands. This check-in time is different from Last Seen, which reports general device connectivity. The provisioning client checks in less frequently, typically twice a day.
The following details are useful when developing firmware or troubleshooting a device.
Provisioning status and technical details
The device details page shows one of the following provisioning statuses:
- Not Provisioned: The device has not contacted nRF Cloud yet.
- In Progress: The credential exchange is ongoing.
- Successful: The device is fully operational.
- Failed: The credential exchange did not complete.
For faster iteration during development, reboot the device to trigger a new provisioning attempt without waiting for its next scheduled check-in.
Provisioning
After nRF Cloud adds a device to your project, the device's provisioning client retrieves and executes commands that install its cloud credentials.
All nRF Cloud onboarding commands use the fixed security tag 16842753.
For device onboarding, the provisioning client executes the following modem AT commands:
AT%CMNG=3,16842753,<credential_type>removes an existing credential.AT%CMNG=0,16842753,0,"<root_ca>"stores a trusted root CA certificate.AT%KEYGEN=16842753,2,0generates a private key in the device's secure storage and returns a certificate signing request (CSR).AT%CMNG=0,16842753,1,"<client_certificate>"stores the client certificate issued from the CSR.
Cloud access key
A cloud access key is the device key pair created during provisioning. The private key remains in the device's secure storage, while nRF Cloud registers the public key. The device uses the private key to sign JSON Web Tokens (JWTs) that prove its identity when accessing nRF Cloud. This lets nRF Cloud authenticate the device without exposing its private key.
Reset provisioning
To re-provision a device, select Reset on its device details page. The device's current connection remains open, and it continues working with its existing cloud access key. Provisioning restarts and generates a new cloud access key only when the device next checks in. Reset provisioning only when the device needs new cloud credentials, such as during development.
Edit and organize devices
- Select Bulk edit devices to change settings across many devices at once.
- Assign devices to cohorts to slice your fleet into mutually exclusive
groups—for example a
betaand aproductioncohort—so you can release new firmware to a small test group before rolling it out to everyone. See Cohorts.
Deactivate, reactivate, and remove devices
There are two ways to take a device out of service. They differ in whether the device stays claimed by your project:
- Deactivate removes the device from your fleet but keeps its claim, so you can reactivate it later and no one else can onboard it in the meantime.
- Delete Device removes the device from your fleet and releases its claim, so it can be onboarded again later, including by another organization or project.
Deactivate a device when you want to temporarily take it out of service, and delete it when you are done with it permanently.
Deactivate a device
- In nRF Cloud, open the device's details page and select Deactivate.
While a device is deactivated:
- The service rejects the device when it attempts to authenticate.
- Its provisioning client receives no provisioning commands, so its check-in time stops updating and you cannot reset its provisioning.
- Its Nordic Identity stays claimed by your project, so no other organization or project can onboard it.
- Deactivation affects only the device's state in nRF Cloud. It does not send any command to decommission, reset, or erase the device itself.
Find and reactivate a deactivated device
A deactivated device leaves the Devices list and appears under Deactivated Devices instead.
- In nRF Cloud, go to Fleet → Devices.
- At the bottom of the device list, select View deactivated devices. The list shows each device's ID, device type, and how long it has been deactivated. Select Refresh list if you have just deactivated a device and do not see it yet.
- Select the device to see when it was deactivated and the reason that was recorded.
- To bring the device back, select Reactivate, then confirm.
nRF Cloud adds the device back to the Devices list immediately, but the device must complete provisioning again before it can send data to nRF Cloud. Provisioning begins at its next check-in and generates a new cloud access key. Reactivation restores only the device's fleet membership. All other data associated with the device was deleted during deactivation and is not restored.
Remove a device
Deleting a device is permanent. It does not appear under Deactivated Devices, and its claim is released, so you would have to onboard it again from its attestation token to bring it back. To take a device out of service while keeping the claim, deactivate it instead.
- In nRF Cloud, open the device's details page.
- Open the actions menu, then select Delete Device.
- Type the device ID into the confirmation box, then select Delete.
Troubleshooting
- A device does not appear after onboarding. Newly added devices can take a few minutes to appear. Wait, then reload the Devices list.
- A device was added but never checks in. The device is registered, but it has not run its provisioning commands, so it has no credentials for connecting to nRF Cloud. Confirm that the firmware on the device enables the provisioning client. See Device firmware requirements.
- Onboarding fails with
Device is already onboarded to another project. An attestation token verifies the device's hardware identity, but it does not transfer the device between organizations or projects. A device can belong to only one project in one organization at a time, which prevents another organization or project from taking control of it. Remove the device from its current project, then try onboarding it again. - Authentication failed. If a device continues to fail to register, or nRF Cloud does not recognize it, contact support.
- Provisioning Status remains Not Provisioned. The provisioning client has not checked in. Confirm that the device is powered on and can connect to nRF Cloud, then wait for its next scheduled provisioning check-in. During development, reboot the device to trigger a new provisioning attempt instead of waiting.
- Provisioning Status remains In Progress. Check the last check-in time. If the time continues to update, the credential exchange is progressing. The provisioning client typically checks in twice a day.
- Provisioning Status is Failed. Copy the displayed failure details and contact support. Reset provisioning only during development or when the device needs new cloud credentials.
- Provisioning Status is Successful, but the device is not sending data. Successful provisioning confirms credential setup, not general connectivity. Check Last Seen and the device's network connectivity separately.