nRF93M1 Onboarding
The nRF93M1 runs the nRF Cloud client in the module firmware. You can onboard it using AT commands over the module's serial interface, without building a host application that includes a cloud library. The device proves its identity with a registration JSON Web Token (JWT), signed with a private key that never leaves the device.
For nRF9151 and nRF9161 devices, see nRF91 Series Onboarding.
Before you begin
- Supported hardware: nRF93M1.
- Device: An nRF93M1 DK, with the supplied LTE antenna attached and the supplied SIM inserted.
- Account: An nRF Cloud account with access to your organization's default project. nRF93M1 onboarding is available only from the default project. You cannot onboard an nRF93M1 to a non-default project.
- Tools: nRF Util and the Serial Terminal app from nRF Connect for Desktop.
- Device firmware: Module firmware v1.5.0 or later, which supports the
%REGJWTcommand. RunAT+CGMRto check the installed version. No host firmware changes are required. - Network: A working LTE network connection.
Connect USB1 on the DK to your computer, then identify the AT command port:
nrfutil device list
In Serial Terminal, open the vcom1 port at 115200 bps. This is the port that
communicates with the module. Enter AT and confirm that the module returns
OK.
For more about the nRF93M1, see the nRF93M1 guide in the nRF Connect SDK documentation.
Device identity
The module provides the following identities and credentials:
| Command | What it returns |
|---|---|
AT%DEVICEUUID | A 36-character device UUID, generated once and stored in non-volatile memory. This becomes the device ID in nRF Cloud. |
AT%CLOUDACCESSKEY | The device's P-256 ECC public key in Base64-encoded DER format. The corresponding private key never leaves the device. |
AT%REGJWT | A signed registration JWT used for onboarding. The JWT contains the device UUID, so you do not need to enter the ID separately. |
AT%JWT | A short-lived authentication JWT for accessing cloud APIs after onboarding. |
AT%REGJWT and AT%JWT serve different purposes. Use the registration JWT from
AT%REGJWT in the onboarding wizard. The device's system time does not need to
be set to generate a registration JWT.
How to add a device
-
In nRF Cloud, open your organization's default project.
-
Go to Fleet → Devices.
-
Select Add devices.
-
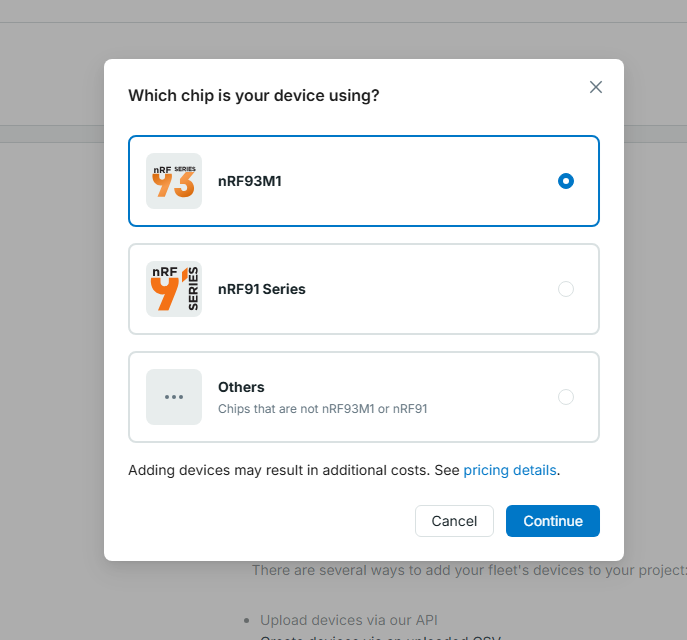
Select nRF93M1, then select Continue.
-
On the Get Device Credentials step, copy the complete
AT%REGJWTcommand. The command already includes your team ID.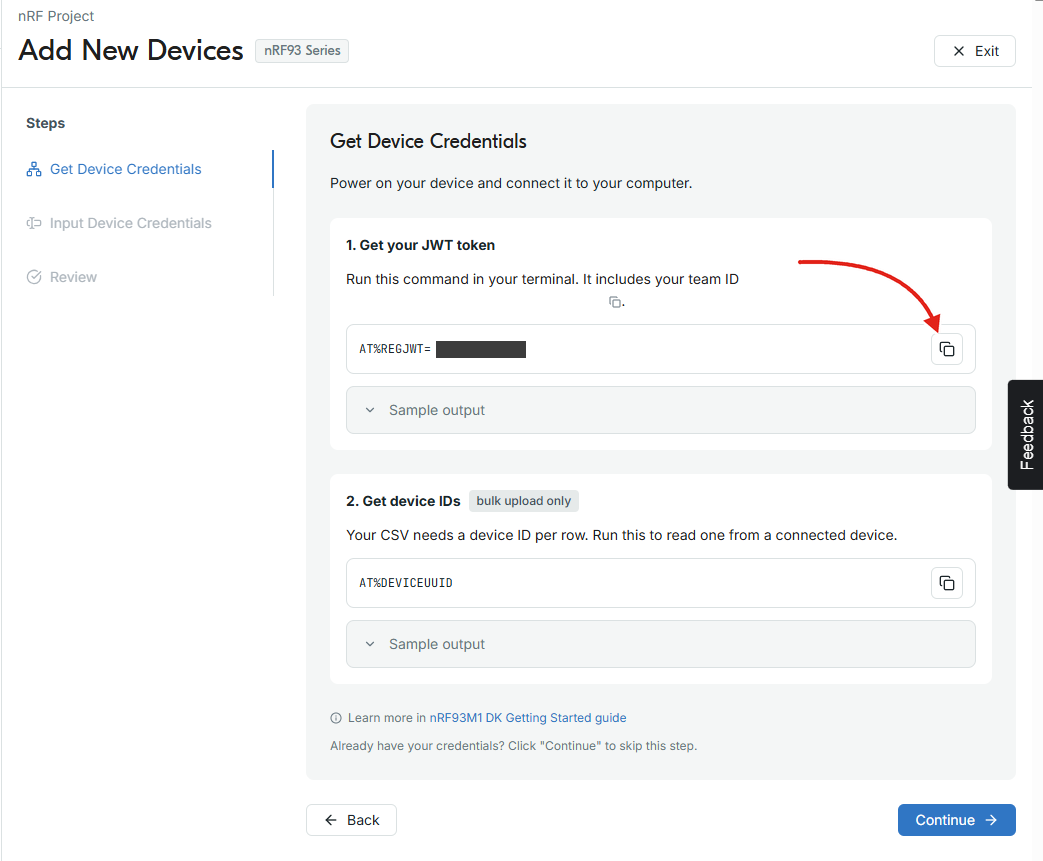
-
Run the command in the serial terminal. The module returns the registration JWT:
AT%REGJWT="<team-id>"%REGJWT: eyJhbGciOiJFUzI1NiJ9.eyJzdWIiOiJkZXZpY2UtaWQifQ.invalid-signatureOKThe command copied from the wizard contains your actual team ID instead of
<team-id>. -
Copy only the token after
%REGJWT:. -
Return to the nRF Cloud onboarding wizard and select Continue.
-
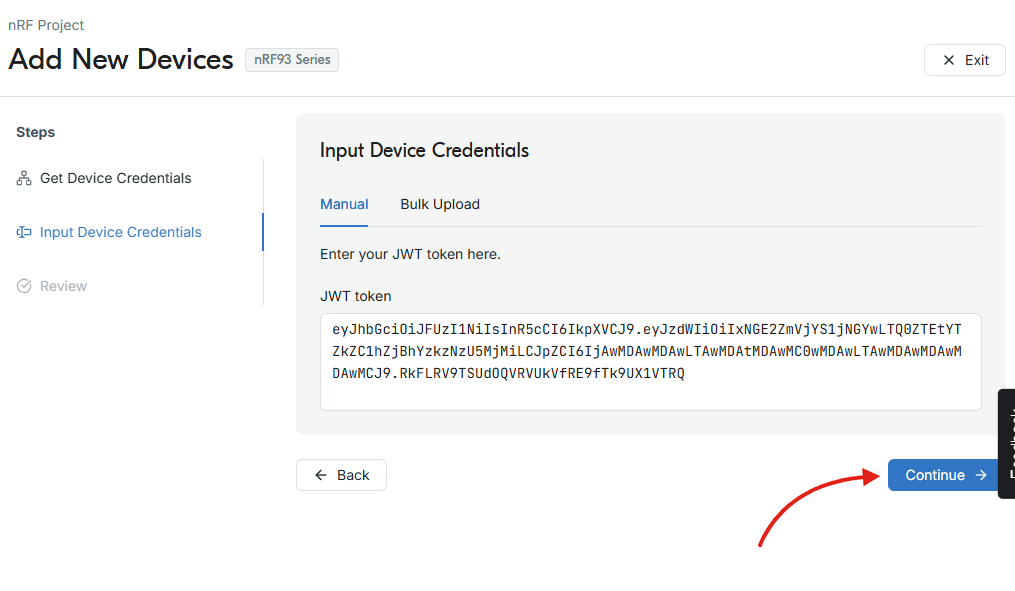
On the Input Device Credentials step, select Manual, paste the registration JWT into the JWT token field, then select Continue. The wizard reads the device ID from the JWT.
-
On the Review step, check the device information, then select Continue to add the device.
nRF Cloud opens the device's details page once the device is available. This can take a few seconds. If the device does not appear in time, nRF Cloud opens the Devices list instead.
Add devices from the command line
You can also onboard devices with the nrfcloud CLI, for example on a
production line. You need an
organization auth token (OAT)
and the CLI, which is installed with the Memfault CLI:
pip install "memfault-cli>=1.12.0"
-
Read the device UUID and registration JWT from the module. Use the complete
AT%REGJWTcommand from the Get Device Credentials step of the onboarding wizard, which includes your team ID:AT%DEVICEUUID%DEVICEUUID: b9902bbe-a0c3-1f03-bf00-7b02f8e5c103OKAT%REGJWT="<team-id>"%REGJWT: eyJ0eXAiOiJKV1QiLCJhbGciOiJFUzI1NiJ9.eyJzdWIiOi...S1DCLnrBe4Lx8ksbOK -
Add a row per device to a CSV, with the registration JWT in the
onboardingTokencolumn:devices.csvdeviceId,onboardingTokenb9902bbe-a0c3-1f03-bf00-7b02f8e5c103,eyJ0eXAiOiJKV1QiLCJhbGciOiJFUzI1NiJ9.eyJzdWIiOi...S1DCLnrBe4Lx8ksb -
Create the devices, with your OAT, organization slug, and project slug in
NRFCLOUD_OAT,NRFCLOUD_ORG, andNRFCLOUD_PROJECT:nrfcloud --org-token $NRFCLOUD_OAT \--org $NRFCLOUD_ORG --project $NRFCLOUD_PROJECT \device create --csv devices.csvThe CLI prints
OKor an error for each device, and exits with a non-zero status if any device fails.
See Onboarding Devices with the CLI for batch limits, automation, and error handling.
After onboarding
Confirm that the device appears under Fleet → Devices. The device is now provisioned and authenticated.
To send a first heartbeat and view the device's LTE metrics in nRF Cloud:
-
Upload the Symbol File that matches the module firmware version, as described in the nRF93M1 guide. nRF Cloud needs this file to decode the metrics the module reports.
-
In the serial terminal, capture a heartbeat:
AT%NRFCLOUDOBSHEARTBEATOKThis is a debug command. In normal operation, the module captures heartbeats periodically.
-
Upload the captured data to nRF Cloud:
AT%NRFCLOUDOBSUPLOAD%NRFCLOUDOBSUPLOAD: UPLOADED,<n>OK<n>is the amount of data uploaded. To send the data to a specific project instead of the default routing, pass its project key:AT%NRFCLOUDOBSUPLOAD=<projectKey>. -
Check the Processing Log on the device's details page to verify that the uploaded data has been processed successfully, and view the processed metrics.
-
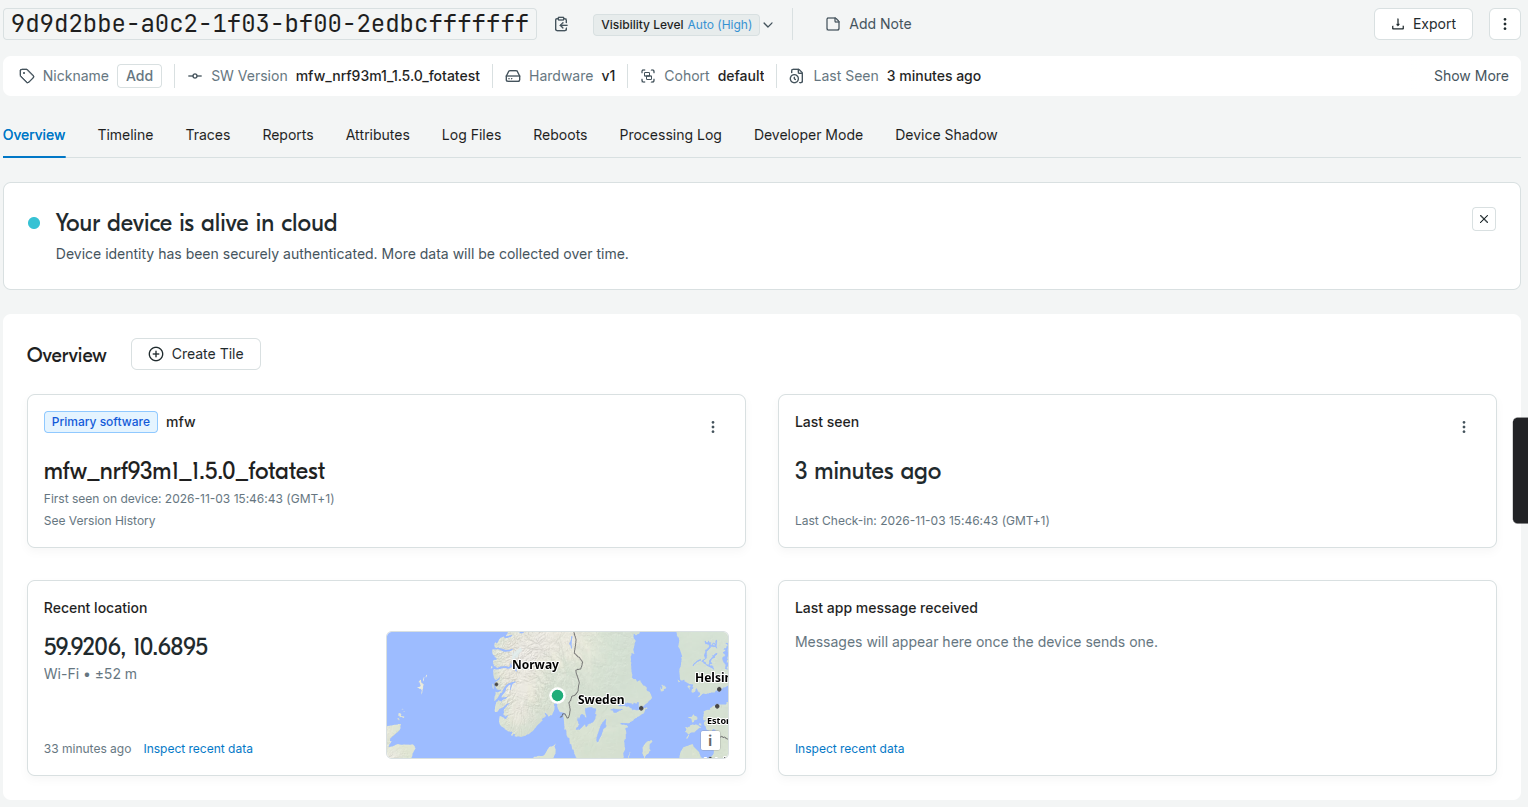
Request the device's location using single-cell (SCELL) positioning:
AT%NRFCLOUDLOCATION=1,1%NRFCLOUDLOCATION: <latitude>,<longitude>,<accuracy_meters>,1OKThe location appears in the Recent location tile on the device's Overview page:
-
Open the device's details page in nRF Cloud and confirm that the heartbeat metrics appear.
Troubleshooting
- The registration JWT is rejected. Confirm that you copied only the token
after
%REGJWT:and that you used the completeAT%REGJWTcommand shown in the wizard for the current team. AT%REGJWTreturns an error. Confirm that you copied the complete command from the wizard and that the team ID is enclosed in double quotation marks. RunAT+CGMRand verify that the module firmware is v1.5.0 or later.- The device does not appear after onboarding. Newly added devices can take a few seconds to appear. Wait, then reload the Devices list.
- The wizard reports that the organization is not linked to nRF Cloud. You cannot add devices until an admin links the organization to nRF Cloud. The Get Device Credentials step also cannot fill in your team ID until then. Contact your organization admin.