Onboarding Devices with the CLI
This quickstart guide shows how to onboard devices to nRF Cloud from the command
line with nrfcloud device create. Use it to script onboarding on a production
line or in CI instead of adding devices one at a time in the nRF Cloud
application.
Most devices, including the nRF9151 and nRF9161, should be onboarded with the identity attestation token generated on the device. The token is derived from the device's Nordic Identity, which is injected into the chip during manufacturing, so you never handle private keys on your production line. The device then creates its own credentials when it first connects.
See Device Onboarding for how secure onboarding works, and Secure Device Onboarding if you are migrating from claiming in legacy nRF Cloud to the unified experience.
Only devices without a Nordic Identity, such as the nRF9160 and nRF71 Series Wi-Fi devices, need their own certificate. See Manually provisioning a device certificate.
Prerequisites
Before you begin, to follow this guide, you must have:
- An nRF Cloud account with the Organization Admin role, which is required to create an organization auth token (OAT).
- Device firmware that includes the nRF Cloud provisioning client. See Device firmware requirements.
- A working Python 3 environment.
Step 1: Log in to nRF Cloud
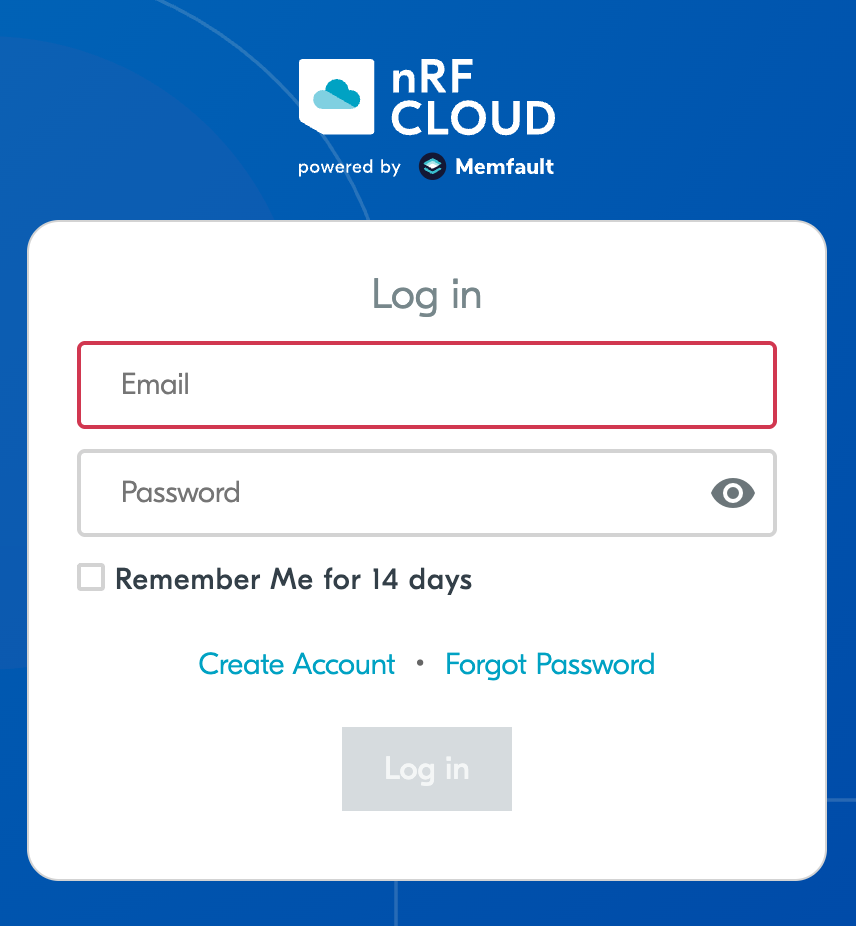
Go to nRF Cloud and sign in with your nRF Cloud credentials.
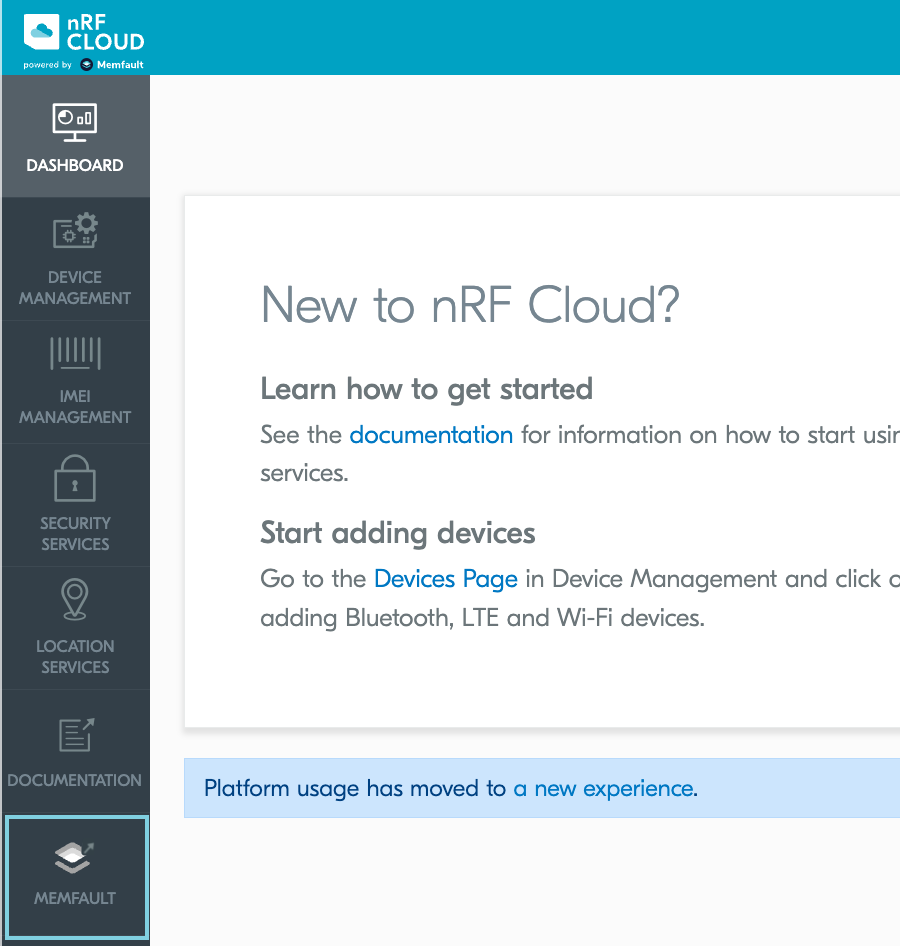
Once signed in, you land on the nRF Cloud dashboard.
Step 2: Open the Memfault dashboard
This takes you to the Memfault dashboard. If you are on our legacy page, please click the New Experience item on left sidebar of nRF Cloud legacy dashboard.
You briefly see a "Redirecting to New Experience" splash screen, then arrive at the Memfault dashboard for the organization that corresponds to your nRF Cloud team.
If your nRF Cloud team was created before the nRF Cloud integration, you may see a one-time prompt to link or create an nRF Cloud organization. Accept the prompt to continue. The resulting nRF Cloud organization shares the name of your nRF Cloud team and contains a default project named nRF Project.
Step 3: Find your organization and project slugs
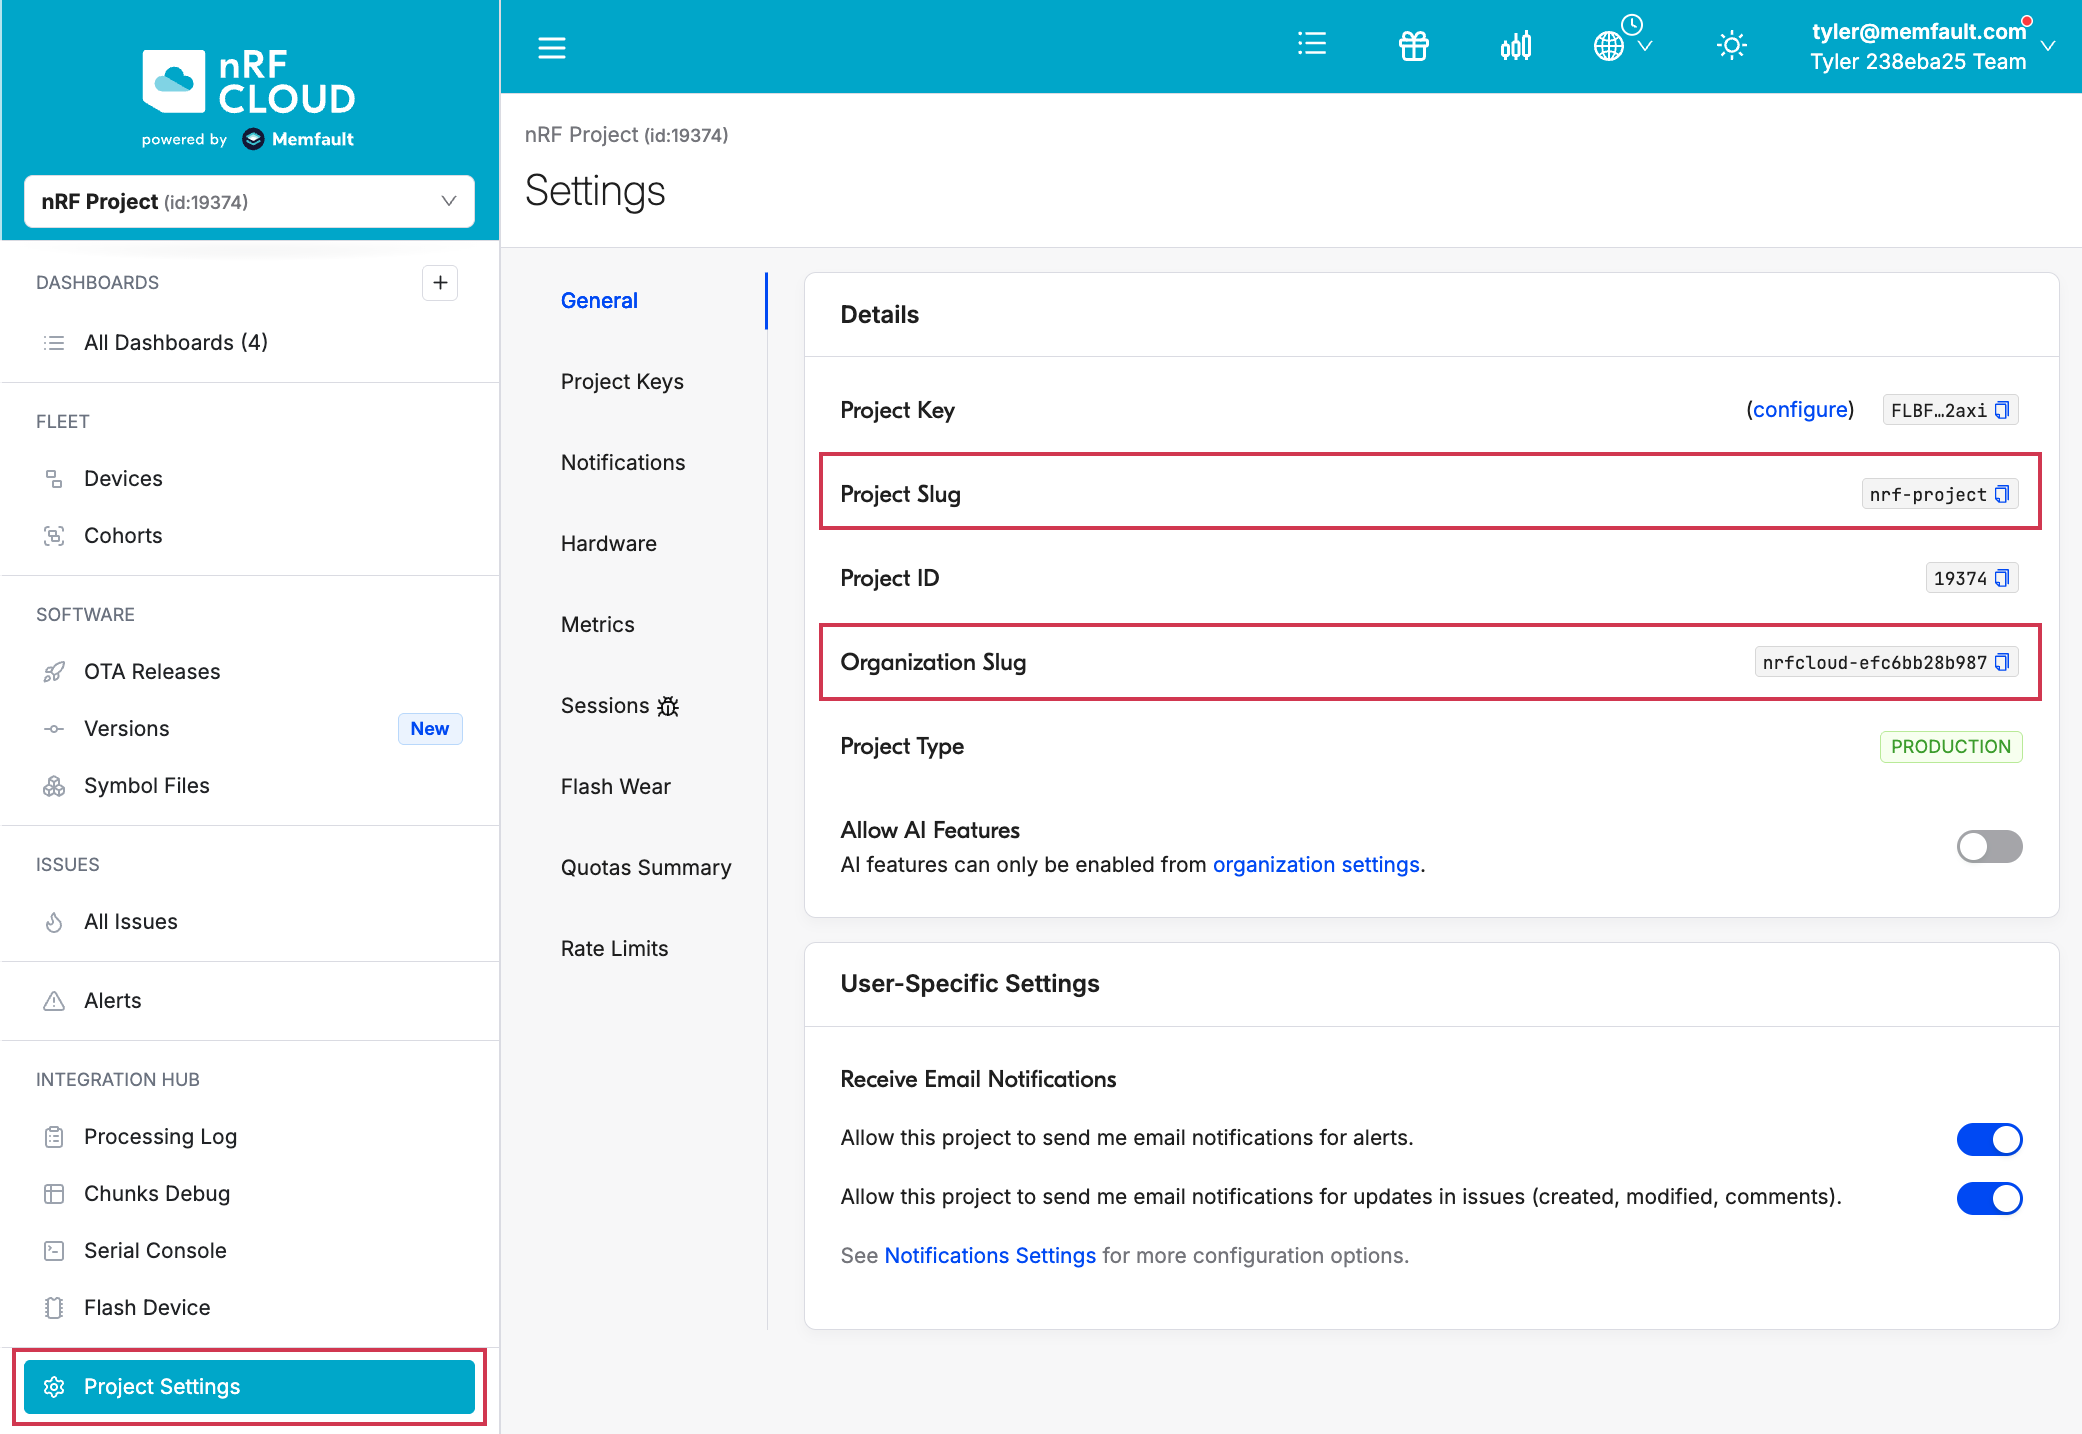
Memfault structures your teams and devices in organizations and projects. You need both the organization slug and project slug to construct Memfault API URLs.
In the left sidebar, click Project Settings → General. Copy the Organization Slug and Project Slug values from the Details panel.
Step 4: Create an organization auth token
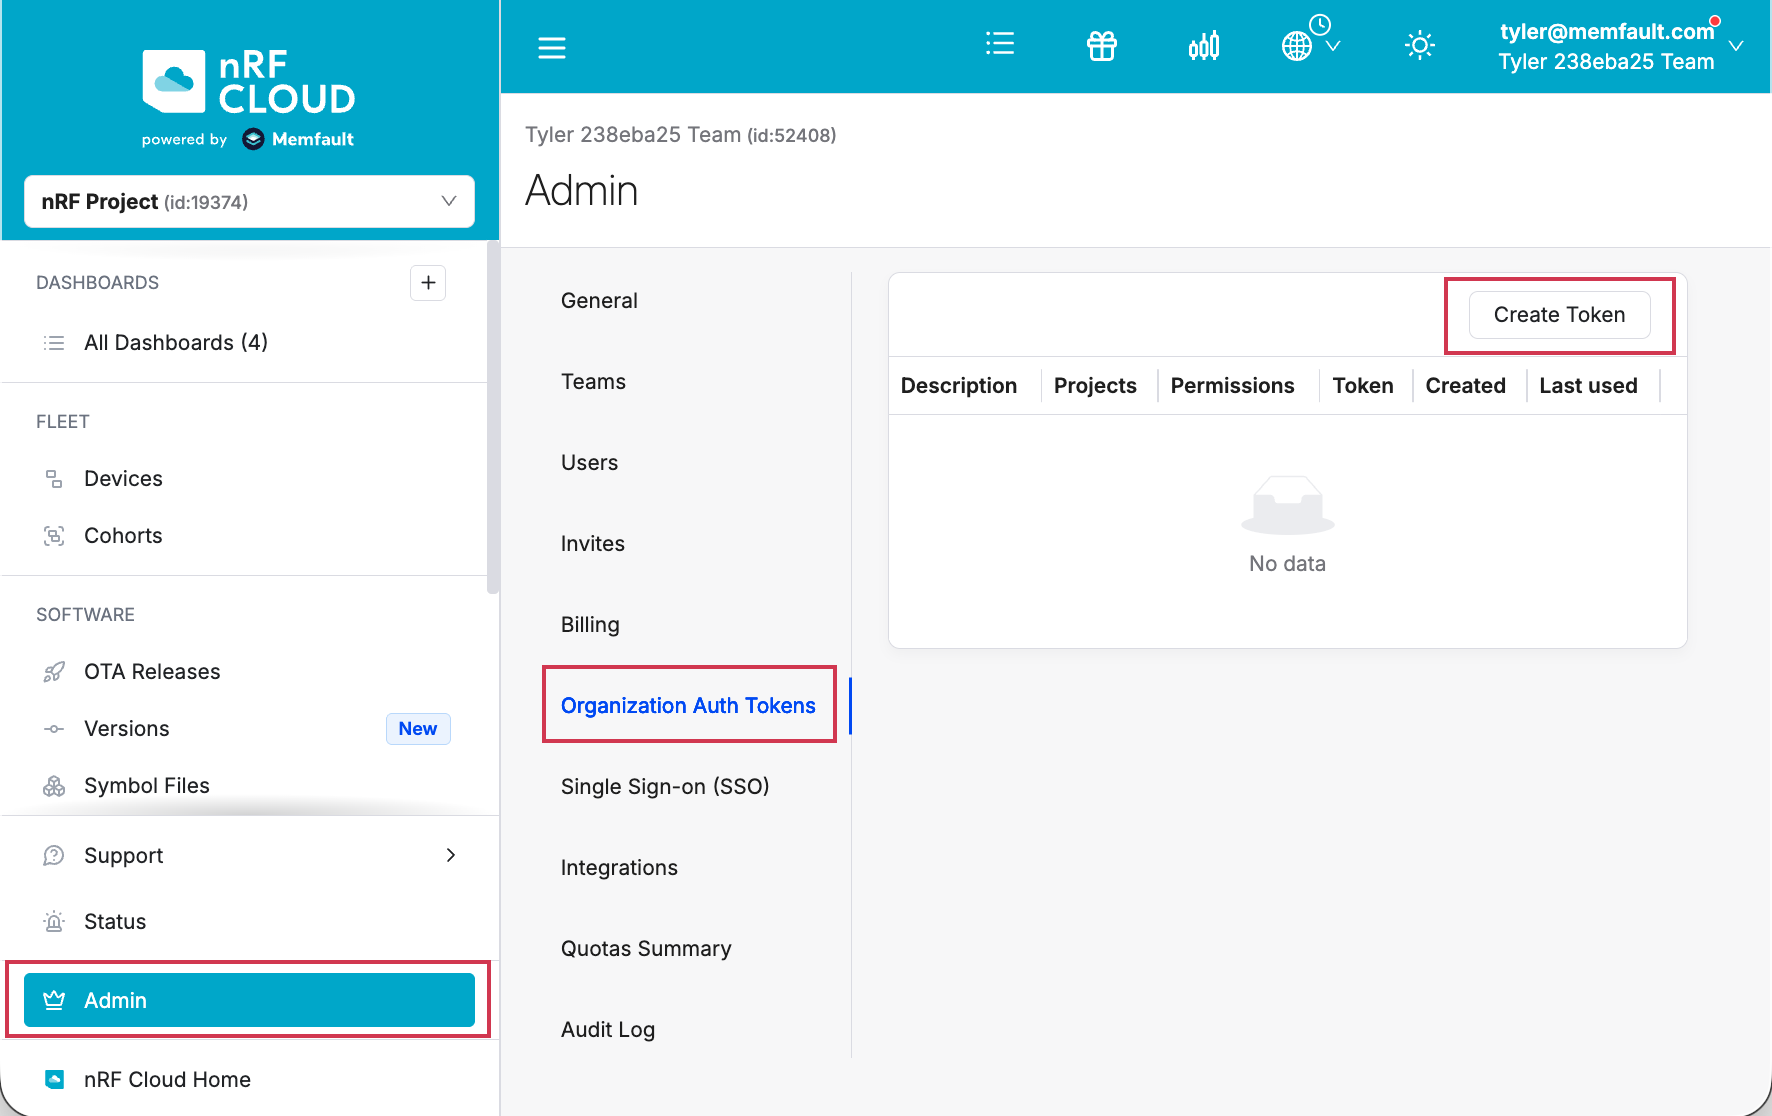
From the left sidebar, click Admin, open the Organization Auth Tokens tab, and click Create Token.
Enter a description of what the token is for (for example, Location Services
or Device onboarding) and click Create.
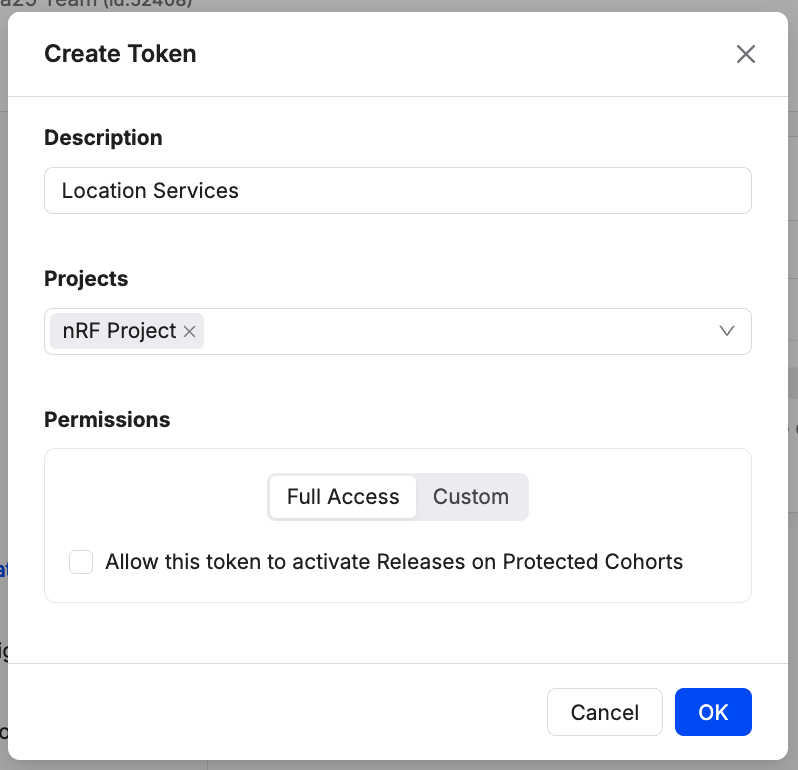
Copy the token immediately and store it somewhere secure. Memfault does not display the secret value again.
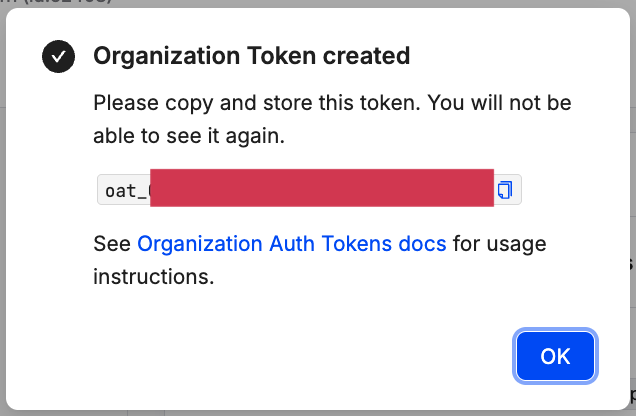
For more details on OATs, see Organization Auth Tokens.
Do not commit OATs to source control or paste them into chat. They grant the same permissions as an organization admin has via the API.
Step 5: Install the CLI
The nrfcloud command is installed with the Memfault CLI, version 1.12.0 or
later:
pip install "memfault-cli>=1.12.0"
Confirm that the device command is available:
nrfcloud device create --help
See Installation for more details.
Step 6: Collect attestation tokens
nrfcloud device create reads a CSV with a header row of deviceId and
attestationToken, and one row per device:
deviceId,attestationToken
cafe0001-0000-0000-0000-000000000001,2dn3hQHYJVDK_gABAAAAAAAAAAAAAAABBlCxawC1AABAAIAAAAAAAAABUAMUJTZHWGl6i5ytvs_g8QI.0oRDoQEmoQRBIfZYQAjRLHhsQgxmlioY9eB9mABZkZGXZ8MLY6GTf1l1IZhlVGnENMB094_5kOKZ-4-28QMfS66ehrhzdenU0LcOMXU
The deviceId is the device UUID encoded in its attestation token.
A single device
Run AT%ATTESTTOKEN on the device. It responds with
%ATTESTTOKEN: "<attestation token>". Copy the token, without the quotes, into
the CSV.
Step 7: Create the devices
The following examples assume your OAT, organization slug, and project slug are
available as NRFCLOUD_OAT, NRFCLOUD_ORG, and NRFCLOUD_PROJECT,
respectively. Pass them with the CSV:
nrfcloud --org-token $NRFCLOUD_OAT \
         --org $NRFCLOUD_ORG --project $NRFCLOUD_PROJECT \
         device create --csv devices.csv --res results.csv
The CLI uploads the CSV, waits for nRF Cloud to process it, and prints one line per device:
cafe0001-0000-0000-0000-000000000001: OK
cafe0002-0000-0000-0000-000000000002: Device ID mismatch with token

Error: 1 of 2 device(s) failed to create.
--resoptionally writes the same results to aDevice ID,ResultCSV.- The command exits with a non-zero status if any device fails, so a script can
detect failures. Rows that report
OKwere onboarded. Correct the failed rows and run the command again with a CSV that contains only those rows. - A CSV may contain at most 1000 devices. Split larger batches into several files.
See the troubleshooting table for the meaning of each error.
Automating onboarding
Every option of the root command can also be set with an environment variable
prefixed with MEMFAULT_. In CI or on a production line station, store the OAT
as a secret and set:
export MEMFAULT_ORG_TOKEN=<your OAT>
export MEMFAULT_ORG=<your organization slug>
export MEMFAULT_PROJECT=<your project slug>

nrfcloud device create --csv devices.csv
Step 8: Confirm provisioning
Devices appear under Fleet → Devices within a few minutes. When each device next connects, its provisioning client installs its cloud credentials. Open a device's details page and confirm that its Provisioning Status is Successful. See What happens after onboarding.
Manually provisioning a device certificate
Devices without a Nordic Identity, such as the nRF9160 and nRF71 Series Wi-Fi
devices, cannot be onboarded with an attestation token. Instead, you sign a
device certificate with your own certificate authority (CA), install it on the
device, and onboard the device with that certificate. The
device_credentials_installer script from nRF Cloud Utils does this over the
device's serial connection.
Prefer attestation token onboarding for every device that supports it. With this method, you are responsible for protecting your CA private key, and each device must be provisioned over a wired connection.
Install nRF Cloud Utils with pip install nrfcloud-utils, then create a local
CA. This writes the CA certificate and its key pair to .pem files with a
unique prefix. Store the private key securely and reuse the same CA for all of
your devices.
create_ca_cert
Next, install credentials on the device. The steps depend on whether the device has a Nordic cellular modem.
Cellular devices (nRF9160)
The device must be connected over USB and running firmware with the AT Host library, such as the AT Client sample. On the nRF9160, modem firmware v1.3 or later is required.
The script has the modem generate a key pair, signs the device certificate with
your CA, installs it with the root CA certificates, and records the device in
onboard.csv.
The device ID must match the client ID that your firmware uses to connect to nRF
Cloud. If your firmware selects IMEI-based IDs
(CONFIG_NRF_CLOUD_CLIENT_ID_SRC_IMEI) with an nrf- prefix, use:
device_credentials_installer -d --ca *_ca.pem --ca-key *_prv.pem \
  --verify --coap --id-imei --id-str nrf-
If your firmware uses the modem UUID instead
(CONFIG_NRF_CLOUD_CLIENT_ID_SRC_INTERNAL_UUID), leave out the ID options:
device_credentials_installer -d --ca *_ca.pem --ca-key *_prv.pem \
  --verify --coap
Devices without a modem (e.g nRF71x)
Devices without a Nordic cellular modem have no AT interface, so
device_credentials_installer talks to the nRF Cloud credentials shell in the
device firmware instead. The device generates its own private key and
certificate signing request, and the script installs the signed device
certificate, so the private key never leaves the device.
The device must be connected over USB and running firmware with the
nRF Cloud credentials keygen library
and its shell enabled (CONFIG_NRF_CLOUD_CREDENTIALS_KEYGEN_SHELL). This
library is currently available on the main branch of the nRF Connect SDK. To
use --verify, you must also enable
CONFIG_NRF_CLOUD_CREDENTIALS_KEYGEN_VERIFY.
Pass the ID that your firmware uses to connect to nRF Cloud with --id-str. If
you leave it out, the script generates a random UUID that the firmware does not
know about, and the device fails to connect.
device_credentials_installer -d --ca *_ca.pem --ca-key *_prv.pem \
  --verify --coap --cmd-type nrf_cloud_cred_shell --id-str <device_id>
Like the cellular commands, this writes the device to onboard.csv, and the
device is onboarded the same way.
Onboard the devices
To provision several devices, run device_credentials_installer once per device
and add --append so every device is recorded in the same onboard.csv. If the
script reports No device found, specify the serial port with --port.
Then onboard the devices with their certificates. nrfcloud device create reads
onboard.csv as written by device_credentials_installer:
nrfcloud --org-token $NRFCLOUD_OAT \
         --org $NRFCLOUD_ORG --project $NRFCLOUD_PROJECT \
         device create --csv onboard.csv
The subType, tags, and fwTypes columns in onboard.csv are ignored. Use
cohorts to group devices after
they are onboarded.
nrfcloud device create replaces the nrf_cloud_onboard script from nRF Cloud
Utils, which requires a legacy nRF Cloud API key.
You can also write the CSV yourself, with a header row of deviceId and
certificate and each device certificate as a quoted PEM value.